How to Create a Link-in-Bio Page Using Squarespace (And Other Website Platforms Too)
If you’re still using a third-party app like Linktree, Milkshake, or Beacons for your link-in-bio… it’s time to graduate.
Here’s the truth:
Every time you send someone to a third-party link hub, you’re sending traffic away from your website — the exact opposite of what a strong digital strategy should do.
Your link-in-bio should be your own real estate, not rented space.
Your website deserves the traffic, the SEO boost, and the analytics insights — not a platform you don’t own.
The good news?
Creating your own branded links page in Squarespace takes maybe 10 minutes.
And it looks 10x more polished, intentional, and on-brand.
Let’s walk through it step-by-step.
Why You Should Make Your Link-in-Bio Page on Your Website (Not a Third-Party App)
Quick note on Bio Sites: Squarespace offers free Bio Sites - standalone mini-websites that live on bio.site URLs. They work well if you don't have a website yet. But if you already have a Squarespace site, keep reading!
Think about the path someone takes when they meet your content for the first time. They’re scrolling, they’re curious, and your link in bio is their next step. If that link sends them to a third-party site, you lose control of what happens next. The visual language might clash with your brand. The experience might feel generic. And worse: they may never make it onto your actual website at all.
When the link directs to a page on your own domain, the experience becomes seamless. Your brand colors, your typography, your layout, your tone — everything feels cohesive. You’re not asking your audience to hop from one space to another. You’re inviting them directly into your world. That small shift instantly elevates brand perception and reduces friction.
There’s also a practical advantage: analytics. When visitors land on your own link page, you can track their behavior. You can see what they click, how long they stay, and where they go next. That level of insight simply doesn’t exist when your traffic disappears onto someone else’s platform.
And beyond analytics, there’s the SEO benefit. Every external source that points to your domain improves your site authority. If you’re regularly promoting your “link in bio,” why let another company collect the ranking power?
When everything funnels back to your site, your brand becomes the destination — not an optional detour.
How to Create a Link-in-Bio Page in Squarespace
This is simple — promise. You’re basically building a clean, minimal page made up of buttons (your links) styled in a sleek, vertical layout.
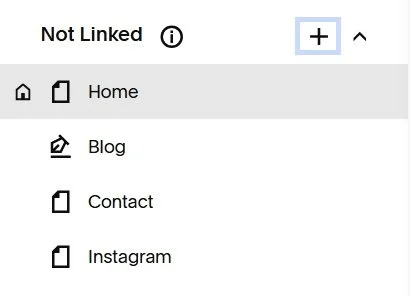
Step 1: Create a "Not Linked" New Page
Go to Pages
Click + Add Page
Choose Blank Page
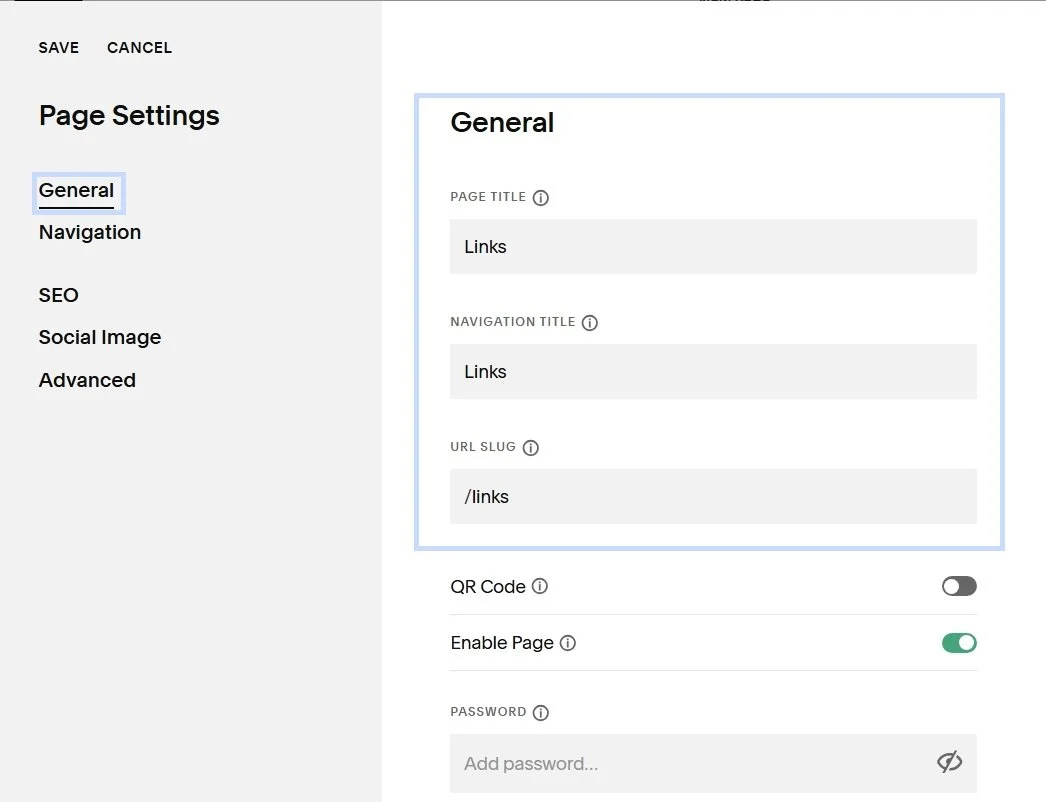
Step 2: Name Your Link In Bio Page and Create Your URL
Once you create your blank page in Squarespace, don’t skip the naming step — this is what makes your link feel polished.
Click the little gear icon next to the page to open Page Settings, then go to the General tab. Here you’ll edit two important things: the Page Title and the URL Slug.
Your Page Title can be something simple and on-brand like:
"Links" (yoursite.com/links)
"Start Here" (yoursite.com/start-here)
"Connect" (yoursite.com/connect)
“Hello” (yoursite.com/hello)
“Link in Bio” (yoursite.com/link-in-bio)
Keep it short, lowercase, and clean. This is the link you’ll paste into Instagram, TikTok, Pinterest, and anywhere else you drive traffic.
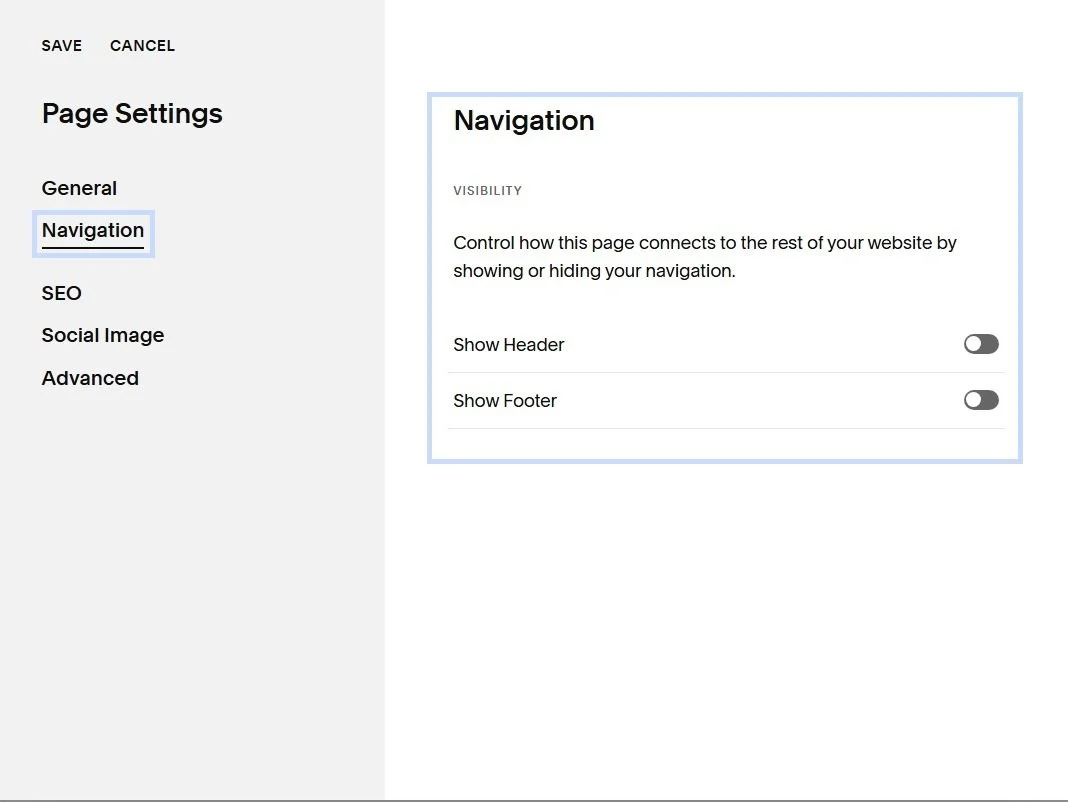
Step 3: Hide the Header & Footer (Optional — But Recommended)
To make your link-in-bio page feel clean and app-like, remove your main navigation. This keeps visitors focused on your links instead of clicking around your site.
In Squarespace 7.1, click the gear icon next to your page, open Page Settings, then go to Navigation. Toggle “Show Header” and “Show Footer” to OFF and save.
Now your page feels streamlined, minimal, and distraction-free — exactly what you want for social traffic.
Step 4: Add Your Header or Logo (Optional — But Recommended)
Before you jump into adding links, give the page a small sense of identity. A subtle logo at the top or a short welcome line instantly makes the page feel intentional instead of thrown together.
Something as simple as:
“Welcome — here’s everything you need.”
“Start exploring.”
“Find what you’re looking for.”
Keep it minimal. This isn’t a homepage. It’s a guidepost.
Step 5: Add Buttons for Each Link
Now comes the heart of the page — your links.
In Squarespace, add a Button Block and begin stacking your links vertically. Style them in your brand colors and keep the wording short, clear, and action-driven.
Think about the most important actions you want someone to take when they land here. That might be:
Work With Me
Shop Templates
Read the Blog
Listen
Join the Newsletter
Book a Call
Popular Post or Offer
Place your highest-priority link at the top. The first button usually gets the most clicks, so make it count.
Step 6: Keep the Design Clean + Mobile First
A strong link-in-bio page feels like a simplified landing page. One background color. Full-width buttons. Plenty of spacing. No clutter.
90% of people will view this page on their phone, so scroll through it on mobile before publishing. Make sure it feels easy to tap, easy to scan, and easy to understand in seconds.
If everything feels breathable and obvious, you did it right.
Step 7: Publish + Add to Your Instagram Bio
Once you’re happy with the layout, publish the page and copy the URL — something clean like:
yourdomain.com/links
Then paste it into Instagram, TikTok, Pinterest, YouTube — wherever you’re directing traffic.
That’s it. You now have a branded link hub that lives on your website and works for your business instead of sending visitors somewhere else.
What About WordPress, Showit, or Wix?
Even though this walkthrough focuses on Squarespace, the concept is universal across all modern website platforms.
Whether you’re using WordPress, Showit, or Wix, the idea is exactly the same: create a blank page, strip it down to its essentials, and fill it with clean, mobile-friendly calls to action. You have full freedom to make the page look and feel like your brand, using the editor tools you already know.
Each platform allows you to create buttons, adjust spacing, hide headers, simplify the layout, and publish a custom URL. The design language might vary, but the strategy is identical.
Your link hub should feel like a natural extension of your website — because that’s exactly what it is.
What to Include on Your Link Page (And What to Leave Out)
One of the advantages of building your own link-in-bio page is the ability to customize without cluttering. You can include an intro, a small photo, or even a freebie opt-in if it aligns with your brand. But the page works best when it stays focused. Your audience arrives looking for direction, not decoration.
A few well-chosen links are far more effective than a long list of options. Prioritize the actions you want your audience to take. Let each button guide them toward a meaningful next step. And allow the minimal, mobile-first layout to do the heavy lifting for you.

The Bottom Line
At the end of the day, your link-in-bio page is one of the simplest places to strengthen your brand — and most people overlook it. Creating your own custom page on Squarespace (or whichever platform you use) is a small shift with a big payoff.
You keep your traffic.
You maintain your branding.
You improve your analytics.
You elevate your professionalism.
Most importantly, you create a seamless experience that guides people deeper into your business rather than away from it.
Your website should always be the destination. This is how you make sure it stays that way.